Do Too Much December is HERE.

Saturday, December 14, 2013

The Battle of the Reviews: Which One is True?

Recently, I watched two YouTube videos about NaturelleGrow . Now to someone unskilled in discerning product reviews, it might make your head hurt to determine which review was "correct". One young lady didn't have a lot of positive feedback for the product. Meanwhile, the other young lady was raving about the SAME product.


So, when you are watching YouTube, do you know EXACTLY how to understand a product review? Do you even know what makes a GOOD product review versus a BAD one? Is there anything such as BOTH reviews being correct? First of all, when watching any type of beauty product review, you MUST remember that not everyone's body chemistry, hair, skin, and nails are the same. What may be the holy grail for one person may be bane of someone else's existence. Keep in mind that some people have allergies and some products are exactly what that person's hair and skin craves. Now the last piece is very important in scrutinizing product reviews. Consider the person's hair and/or skin type, duration of time using the product, and HOW the person used the product. For example, if the person used the product in a different way other than the company suggests, can you REALLY disbelieve that the product works?


I enjoyed both product reviews by the ladies featured in each of the YouTube videos. Both were honest and provided insight into their use of the NaturelleGrow products. You all know me if you've been reading long enough. I know what my hair likes and doesn't like. So, I'm not really looking to try out any new products per se. However, I will continue to try products from within the same company. I look forward to using new products that Renee creates. Not only does my hair drink in her products and thrives with them, but also I respect her integrity and work ethic.

The next time you select a YouTube video, just keep an open mind and remember that what may or may not work for the other person, may or may not work for you. It doesn't mean that the person was dishonest or negative. It may just mean that your hair just likes different things! It's ALL good! Let's continue to support black businesses and provide positive critique. I like how articulate BOTH ladies were in their review. THESE are the kinds of videos we need to see more of. Our natural hair community won't grow with negativity. Just as a flower needs light and water to grow, we can only grow as a community from positive communication, helpful critique, and a spirit of collaboration!


Tuesday, December 10, 2013

My Winter Routine 2013

The winter time in the DMV (Washington DC, Maryland, Virginia) area can be very cold. I know it doesn't get as cold as other destinations, but it gets cold enough to make me whip out my thickest oils and concoct a winter spray mixture. I was perusing Youtube when I came across Naptural85 and there was a video on a nourishing hair and body oil. I automatically perked up because my hair strands were coughing and in need of moisture. Yes, I know oil doesn't provide moisture. It seals in moisture. So, off I went to MOM's Organic (think Wholefoods but slightly smaller) to buy the key oils for this mixture. It is ultra nourishing and my hair was thanking me for using it. No, seriously I swear my hair high fived me when I finished spritzing my hair.

WINTER HAIR OIL

In order to make the nourishing hair and body oil you will need to have castor oil, jojoba oil, avocado oil, olive oil, and sweet almond oil. Get yourself an empty bottle. I found an oil bottle that I wasn't using but you may want to get one especially for your oil. Then do about an ounce for each of the heavier oils (i.e. castor, olive, and avocado) then about 1/2 ounce for the sweet almond and jojoba. You may want to adjust the oil for your liking.


AYURVEDIC  HAIR CARE

My scalp goes haywire with the winter weather, so I decided to step it up on my Ayurvedic hair care. Once a week I use Sukesh Ayurveda as a scalp treatment/prepoo. I put heated aloe vera juice (about a 1/2 cup), rose water (about 1/2 tsp), 4 tsp of Sukesh Ayurveda powder, and 20 drops of clove oil. Sometimes I will add the Henna Sooq Cocoveda oil which has many of the Indian oils along with ginger extract and coconut oil. It is a very moisturizing oil and my scalp loves it. First, I mix the ingredients and make a paste to on my scalp. Then, I use the remaining paste to put on my hair. I start with the ends of my hair first then work my way up. I make about 6 big twists and then wrap my head up with Saran Wrap. Ah, I know. So lovely. There is usually a funny earthy smell from the herbs, but I think the rose water cuts down on the aroma.


MAD MOISTURE SHAMPOO BARS

My hair and scalp LOVES shampoo bars. My most recent purchase is a definite must have for fighting dry hair. It's called Mad Moisture from . It is actually a hair and body bar. So, I like how I can use it on my hair then wash up with it to nourish my skin. The first time I used this lovely shampoo bar, I couldn't believe the absolute moisture. I have been using the Mad Moisture shampoo bars for about a month now and it never disappoints.


KINKY CURLY KNOT TODAY LEAVE-IN CONDITIONER

I have gone back to what my hair loves and so, I picked up a bottle of the ultra wonderful detangler, Kinky Curly Knot Today. I typically don't use this conditioner straight from the bottle. I usually take an empty bottle a la Kimmaytube style and I add about 2 Tsp of Kinky Curly Knot Today, 1 Tsp of castor oil and 1/2 tsp of jojoba oil. Most recently I added about a 1/2 tsp of olive oil too. Then, I squirt a generous amount of rose water then fill the rest of the bottle up with regular water. I shake really good and I have my leave in conditioner ready to go.

I love nourishing my hair in the shower, so I will squirt this in my hair then rinse it out. Then, I will add it as a leave in (just a little) after I deep condition my hair. My hair behaves REALLY well using this method. I get to have the LOC (liquid, oil, cream) method in and out of the shower.

NATURELLE GROW HERBAL BLENDS DEEP CONDITIONER

The NaturelleGrow Conditioners are absolutely decadent. I have yet to find any conditioners that are as nourishing, rich, and creamy. My favorite conditioner is the Herbal Blends conditioner. It contains excellent ingredients like marshmallow root, blue malva, slippery elm, burdock root, and mullein. All of the ingredients work to detangle and moisturize the hair. Also, this blend promotes hair growth. I don't like to be without it. My hair craves it! I like to deep condition about 30 minutes every time I cleanse my hair, which is about once a week.


PROTECTIVE STYLES

My top favorite style is twists pinned up or secured with a Goody Oucheess Barett. I use Shea Moisture Curl Enhancing Smoothie mixed with Shea Moisture Curling Souffle on most days. Sometimes I will use a castor oil pomade or Nubian Heritage Indian Hemp & Tamanu Grow and Strengthen Edge Taming Taffy. I wear my hair out every other weekend, but I cover my head with a scarf and beanie then take it off when I'm indoors. I NEVER go outside with my head uncovered as the winter air is very drying.


MY WINTER HAIR ROUTINE IN A NUTSHELL
-Scalp Treatment
-Cleanse
-Condition
-Moisturize
-Seal
-Style

Sunday, December 8, 2013

Medium Hair Don't Care: Share the Love

I have a bone to pick with the natural hair community. Our natural hair is glorious in all shapes, textures, colors, and lengths. Yes, lengths. I am tired of the long natural hair worship. Enough already with the grow your hair to the floor challenges. We're so glad that people can grow their hair long but it seems as though the waist length worship has made people go coo coo for cocoa puffs. No, seriously it has to stop. People are standing on their heads, massaging onion juice into their scalps, and taking horse pills just to grow their hair to new lengths. It's as though the long hair obsession has made people forget how fun and unique our hair is at different lengths.

Now granted I've had my eyes glazed over in awe of big, fluffy puffs type of admiration too. I've watched YouTube on end wishing my hair would grow already so I could stop stalking all the natural hair guru channels. I have purchased special shampoos, creams, vitamins, and oils to help me grow my hair to new lengths-all in pursuit of that extra long natural hair. Well, this tomfoolery stops right here, right now. Ladies, it's time to throw our hands in the air and say, medium hair, don't care. We can hype up medium hair and start a new movement--medium hair worship. Want to know how to do it? Here's how:

1.Flood the internet with medium hair, don't care tweets, Facebook posts, and Youtube vids. Let people know that we say it loud, we're medium haired and proud. Post pics of lovely medium fros, wash n gos and other awesome hair styles. Yes, we can do it! Start posting now.

Enjoying my medium length hair!


2. Complain more about how your medium hair is so hard to care for that you take so long to do it. Now this is important. You see, waist length naturals need to know that it's not the size of the hair ball, it's the length of the detangling session. Our tangles and knots are just as cringe worthy as the waist and hip length naturals. Perhaps even moreso, because we have to be careful not lose the length we already have. They can lose a few hairballs the size of a spider and not suffer, but if we do it, it is a major issue for sure!

3. Connect with transitioning naturals and let them know that medium hair don't care is for them too. After all, they will reach medium hair before they grow beyond lengths, so why not come over to the medium length side. We will establish a community of love, nurturing, and hair acceptance.

So, long hair naturals, no offense but we can't relate to you when you're fluffing your gigantic fro, separating your long hair into twists, and tossing your mane around. Yes, we know that you were our length years ago, but we don't care. Some of us have years to get to that length and so, rather than worship or hate you, we chose to carve out our own niche in the natural hair community. We are medium length naturals and we are proud.

Wednesday, December 4, 2013

I Do Too Much

I love how people like to say "Oh, you do TOO much" when perhaps they do too little. If doing too much means that I care greatly for my hair, then I will proudly shout from the rooftops, "I'm a natural and I do too much." I will sit down in a 12-step program in a discreet location, pull my natural hair products out, log onto YouTube and confess how I LOVE caring for my natural hair. Doing my hair is not a chore; it's a priviledge. You see, when you've had the displeasure of losing tufts of hair and having people ridicule you for bald spots, then you'd probably do too much to grow back hair that was lost too.

Don't you love when the people who are insecure for whatever reason declare that what you're doing is TOO much? Typically, the "Do Too Much" people are VERY easy to spot. You can hear them before you see them and when you see them, you'd rather forget them. Don't get me wrong. No one that I know of actually enjoys spending long lengths of time detangling. BUT, there is nothing wrong with a lovely home spa session giving your natural hair the TLC it needs.

Crown me the Queen of Do TOO Much!


So, in honor of all the "do too much" natural haters... I'd like to share some advice on how to keep them at bay while you continue doing what you do.

1. How about we agree to disagree? I would say that the Do Too Much people would love to push on others how actually taking time to select quality products and detangle your hair is TOO much. Well, I agree to disagree. I agree that if we disagree then we don't have to agree on ANYTHING. Did you get what I mean? In other words, you do you and I'll do me. We don't have to use the same techniques or products. I'll keep on growing my hair where there was none and thank the Lord, I don't have to follow anyone's rules, but my own.

2. I really don't do all of what you think I do (allegedly). If I wrote down all that I did in a wash session or even from day to day, it may seem like too much. But, I don't wear makeup, so I figure my hair stuff makes up for it. Maybe I think it's too much to wear foundation, so we can meet the middle. I'll keep on pampering my hair and you can keep your make up. Agreed?

3. My "expensive" products in reality are less than the cheap drugstore stuff. OK, so I probably will step on toes, but hey, I do too much, so let me proceed on. Let's do some math here. If your product costs less than mine BUT you use A LOT of product, whereas I don't use as much, then ummm... I would calculate that you are actually spending more than me. I use a dollop of my natural products, because my hair loves them and I don't have to heap on stuff that just sits on top of my head. Perhaps you love your drugstore stash. Well, I love my organic stuff. Isn't it wonderful that natural hair companies come in Gucci, Prada, and Nada prices? You can find products for every budget and product preference.

4. It only affects me, so why does it bother you? If what I do is for MY scalp and hair, then why do you even care that much? You could cut all your hair off, paint a tattoo on your bald head, then find a golden wig to wear. Do I care? Not a bit, honeydew. You can go all squirrel monkey dashing through the store looking for your hair and I'll take care of what I have. Am I knocking the weave hussle? Well, as long as you're not knocking me taking care of what grows out of my scalp.

OK, now that we've established that I do TOO much then I figure it's done and I can go ahead and go do my pre poo, henna, shampoo, deep condition, steam session. I mean, time is wasting and I got stuff to do!!!!

Monday, November 4, 2013

Can Prayer Make Your Hair Grow?

Just recently I was sharing about how prayer is powerful. I can't tell you how many times I've prayed and my prayers were answered. Now I want to be careful here. I don't look at God as some type of genie. You can't rub your Bible and expect money to fall from the sky. However, prayer is a conversation between humans and God. So, you may be asking why is she talking about prayer on a hair forum? Think about it... If you pray about your problems then why not pray for hair?

Prayer helps with stress. There is nothing like meditating and just laying your burdens at the altar. Often times, I stress about things that I cannot change. It makes me feel all the better to pray about what is stressing me out. Stress is not good for the body, skin, or nails. Less stress equals more growth and length retention.

Prayer requires dedication and commitment. In order for prayer to work consistently, you have to keep at it and not give up when it seems that no one is listening. When I did not know which products to buy or what to do with it, I asked God for knowledge and guidance. He directed me to resources which helped me gain knowledge.

Praying helps you to remain focused. If you need direction and you're wondering where to begin, just begin with prayer. The prayer of the lost is very compelling.

Something as menial as hair can become something very important in the grand scheme of things. Hair, skin, and nails are our bodies' billboards. If something is not right on the inside, then it shows on the outside. The natural hair world can be quite confusing and intimidating. You may ask fifty different people and get fifty different answers.

I would not say to use prayer as a last ditch effort, but in fact, use it as a tool for guidance, comfort, and wisdom.

Thursday, August 22, 2013

Easy Homemade Hair Growth Balm

I've come across a homemade hair growth balm recipe that will soothe the scalp, stimulate hair growth, and keep dandruff and flakes at bay. If you have a scalp condition, such as seborrhea dermatitis, then you will find this lovely, easy recipe to be miraculous! As many of you know, I have seborrhea dermatitis and when I get a flare up, I have miserable, itchy scalp. Follow this recipe and your hair will thank you!! The original recipe can be found on Indian Make up Blog. You can substitute the coconut oil for olive oil and the grape seed oil for almond oil. Tweak the recipe to your liking.

Easy Homemade Hair Growth Balm


3 Tbsp coconut oil 

4-5 drops of grape seed oil

30 drops of clove oil


Spoon the coconut oil into a small container. I used an old gel container. Then add the grapeseed oil. Next, add the clove oil. Carefully mix with a spoon. Store in a cool area to keep a balm consistency. To use it as a hot oil treatment, hold the container under hot water to make it a liquid.


Homemade Hair Growth Balm

How to Use the Homemade Hair Growth Balm

The homemade hair growth balm can be used as a prepoo, warmed up for a hot oil treatment, or leave in the hair as a hair oil. It smells incredibly good-- a mixture of spicy, warm, and a hint of citrus. Use the oil 1-2 times a week for maximum hair growth potential. I've been using this oil for about two weeks and it has given me the most incredible relief from my scalp condition. On the first application it made the itching stop on contact. By the second application the bumps that I have on my scalp had shrunken by 50%! This is some powerful stuff!!!  

Clove Oil: The Amazing Little Known Oil

I researched powerful oils that stimulate hair growth and I came across the very overlooked, clove oil. I was in the process of placing another henna order, when I clicked on hair growth on the HennaSooq webpage. There I found several oils and herbs, but my eyes rested at clove oil. According to the HennaSooq page clove oil promotes hair growth and prevents hair loss. Upon further googling I found that clove oil is touted as a powerful analgaesic and antiseptic. In fact, some people use clove oil for tooth pain. Others use clove oil to get rid of dust mites, deter unwanted cat behavior, and provide a wonderful aroma in the home. 


Dear Readers, what little known oils do you use to stimulate hair growth?


Sunday, August 11, 2013

It's in the Twists: Tracking My Hair Growth

An old song that my dad loves to listen to says, "It's in his kiss, that's where it is."  It made me think about how did I realize my hair was actually thriving and surviving, besides length checks? I do measure and try to do it monthly, although some months I have fallen short. My goal has been to measure and track my hair growth (and retention) and document my practices, so I can know what works and what doesn't. At any rate, I keep a TON of hair pics in my cellphone and I was scrolling back to some of my earlier hair pics. For my tightly curly/coily hair, a year's growth can only be seen when you look at the volume, because it doesn't look longer unless you uncoil it or heat style it to show the length. Well, I've found another way to track my hair growth: twists.
Front view- October 2012
Side view- August 2013

Yep, twists tell me A LOT about my hair practices. I can see where my hair needs to be trimmed or where it is thinning or even the volume.  When I first started as a natural the length of my unstretched twists barely reached my ears. I had NO hang time and the twists looked like little small peapods all over my head.

Then, as time went on the peapods evolved and they began to reach the back of my neck. They weren't quite hanging down yet, but they were getting there.

Today my twists hang to my collarbone, but over time between pinning them up and adding moisture, they shrink.

Back view-October 2012

Back view-August 2013


Thanks to my twists I can see that I'll be needing to trim a little off the bottom, so that when the hair grows it can thicken up a little. Also, I'm getting more length even with using bigger sections of hair. Usually I get greater length using smaller pieces to twist, but with my hair growth I can still get some "hang time" with bigger sections. That is DEFINITELY an accomplishment!

August 2013-Stretched out twist


Even though it didn't seem as though my hair was growing nicely, it turns out that it was! Just because I didn't see my monthly growth, I didn't feel my hair growth was "normal". But, when I put it all in perspective, sometimes you have to reflect before you can appreciate how far you've come.  I will continue to take a TON of pics and document, so that by this time this year, I can compare more twist pics!!!

Dear Readers, how do you track your hair growth and stay motivated? 

Tuesday, August 6, 2013

It Ain't Easy Being Green: The Trials & Tribulations of Being a Henna Head

While arm deep in green goo the other day, I had an epiphany about how being a henna head isn't all flowers and balloons.  On more than one occasion I've missed my head and slapped henna onto my shirt or on my bathroom floor. I'm so glad that I wear the oldest clothes I can find, because nine times out of ten part of my henna will miss my head and go flying somewhere else. Did I mention that I hennaed my elbow the other day? I literally ended up with henna on my elbow and I didn't see it until I was wrapping my hair up. If I mislead you into thinking that henna didn't have a downside, then I'm sorry. It's like being in a relationship. You see all the goody, goodiness in the beginning and then, the real person steps out. Don't get me wrong. I don't hate henna at all. There are just some things about henna that I have found to be challenging or even annoying.

Eew! The smell, the smell. Is it grass? Is it an herb? What is that?! Only an essential oil will knock the funk away of the great green goo known as henna. All I can say is DON'T even  think of doing henna on a hungry stomach. It made me hungry but sick to my stomach at the same time. I had to pull out some lavender oil and put a couple drops in. That smell is like no other. Someone on a hair blog had the nerve to say that the smell is good and like herbs. Ah, no... Only people who sniff weird stuff would like the smell of henna.

What color will I get? Red, brown, something else? The unpredictable color can be unnerving. No two heads are alike, and so you can get red highlights and your friend can end up with auburn brown. The color that you want may come the first time, fourth time, or never without the right technique. It takes A LOT of work to try to get a particular color out of henna unless you add certain herbs or liquids. Hibiscus tea, paprika, rose water, and rosehips are known to add red highlights to hennaed hair. It can be added to henna to increase the red color. Not a fan of red? Amla powder can give a brown color. Want black or darkened hair? Try using indigo after you henna.


Freshly hennaed hair
Red Raj Henna
HennaSooq.com

By this time next year, I'll be able to wash the goo out. NEVER, ever ever henna hair when you have to do something later that day. I see my henna days as my spa treatment. I make sure to do henna on a day in which I don't plan on going anywhere. I mean, how will I explain my green goo on my hair? Can you imagine seeing a good looking guy and having plastic wrap goop on? Nope, that is NOT sexy!

The bottom line is... It ain't easy being green! Kermit the Frog had it right. Being green means you're different and some people just can't handle different. In the natural community some people hail henna as a natural cure for scalp conditions, provides great strength, and conditioning. Others see it as a hassle and still a few see it as an herbal relaxer. But for me, it has been a game changer. My hair is morphing into boundless curls of gorgeousness. And for that, being green just ain't so bad!!!

Dear Readers, what say you about henna? Share your thoughts!

Friday, August 2, 2013

Moroccan Henna-- How Good Is It REALLY?-Product Review

I'm still learning about the different types of henna and frankly, I'm figuring out which hennas work for me. So far, I've done more reading than hennaing, because I'm not as adventurous as some people. I prefer to do a lot of research before jumping from henna to henna. After lurking hair forums and reading different henna blogs, I decided to deviate from Red Raj and try Moroccan henna.

Here's my disclaimer: Please note that I acquired the Moroccan henna for free. Henna Sooq gave me complimentary Moroccan henna, because there were issues with my order. I am very thankful to Khadijah, the owner for being so professional and generous. Nevertheless, despite the generous gift I am going to share my honest experience and opinion about this henna.

What makes Moroccan henna different? It has a pretty short dye release time compared to others-- 2 1/2 hrs. It makes a very smooth and creamy paste. When I mixed the henna I was quite surprised that the henna paste was so silky. Finally, Moroccan henna does not hold up well when frozen. Unlike other hennas, freezing Moroccan henna interferes with its dyeing ability.

What did I use to mix my Moroccan henna? I dumped about 100 mg of Moroccan henna into a bowl. I took a spoon and crushed any small lumps I saw. Then, I dumped in about 50 mg of Aloe Vera powder. I mixed them dry and made sure that the powders blended. I heated 13 oz of coconut milk on the stove until medium hot. Then, I poured the coconut milk over a hair tea. I let the hair tea steep in the coconut milk for about 30 minutes. Next, I removed the musslin bag (which contained the hair tea) and poured the coconut milk/hair tea mixture into the henna mixture. I slowly did this and mixed the henna with the coconut milk slowly. I added milk into the henna mixture stopping mixing, pouring, and mixing until I got a smooth paste similar to pudding.

Complimentary Carrot Shampoo Bar & Moroccan Henna from
HennaSooq.com


How do I allow the dye to release in the henna? After mixing all the ingredients I covered the bowl with the top and left it to sit on the counter for about 2 1/2 hrs.

How did I apply the Moroccan henna? I donned my free plastic gloves from Henna Sooq. I parted my hair into 4 sections (2 sections in the front and 2 in the back). I applied the paste on each section covering the hair. When I was done I used Saran Wrap and wrapped my hair tightly. I added my Turbie towel over it to create heat using my body heat. I left the henna on for about 6 hrs.

Did I add oils to my henna mix? No, I chose not to add oils to my henna mix this time, because I lightly oiled my scalp with organic coconut oil. If I was going to add oils then I would do it AFTER dye release. Doing so prior to dye release would result in some interference with the color deposit.

How did I rinse my hair? I bent over the tub and rinsed my hair thoroughly turning my head from side to side. The henna ran dark at first in the water. As the henna rinsed off thoroughly, I noticed that the water was lighter. As soon as the water ran clear, I added my shampoo bar. I rubbed Chagrin Valley Shampoo bar in a circular motion on my crown creating a nice foam. I gently massaged my crown, then rinsed my hair thoroughly. Next, I added NaturelleGrow Coconut Cleansing Cream Conditioner into sections of my hair. I left it in my hair for about 3 minutes and then, I rinsed it out. Finally, I applied the Naturelle Grow Herbal Blends deep conditioner. I wrapped my hair up with plastic and left it in my hair for 20 minutes. After rinsing out the deep conditioner I was truly tired and just put leave-in conditioner in my hair, did some loose twists, and went to bed.

How does my hair feel? My hair is incredibly soft and conditioned. My curls feel very smooth and there is no issues with dryness. I knew that using coconut milk would give me the moisture to combat dryness issues that are normally associated with henna. I couldn't stop touching my hair. The curls are slightly looser, but it doesn't concern me. My hair is weird in the sense that it loosens and then tightly curls back up. My curls are springy and shiny. The back which has a tighter curl pattern feels a little like softened wool. I need to stop touching my hair.

My curls after using the Moroccan henna.


How do I feel about Moroccan henna? After my hair dried I was quite disappointed. The effect was very blah and the color did not pop the way it does with Red Raj. My gray hairs were like a dark orange, which I did not like. I did see some darkening in two days, but it was just bland. Red Raj is like my true love. I feel like I was cheating on it with Moroccan henna.

What is the bottom line? I'm glad that I did order a box of Red Raj henna, because I will be doing another henna next week with Red Raj. I need a pop of color and I need it now!!!  Also, the Moroccan henna did not color all of my gray. I have one gray hair in the very front that is still gray after using Moroccan henna. Unbelievable!!! I don't want to overdo it, but I want my hair to be in tip top shape. My color has to compliment my skin tones. Moroccan has orange hues and that definitely does not go well with my red undertones in my skin.

My opinion is that Moroccan henna is best suited for people who aren't looking for a strong red or those who want to use it as a base to use indigo for a brown color. It offers great conditioning and strengthening benefits. I loved how creamy the henna mixture was and it went on my hair smoothly. However, dear Moroccan henna is just not my cup of tea!!!

For more information on Moroccan heanna or to check out other henna powders visit Henna Sooq

To order Naturelle Grow conditioners visit NaturelleGrow

Dear Readers, are you a henna head? Which henna(s) do you love to use? What are your favorite liquids for mixing? 


Monday, July 29, 2013

Perfecting the Art of Twisted Buns

I'm becoming a protective style queen! Twists and buns are my favorite protective styles. This summer I have been beating the heat by staying hydrated with water for my body and moisture for my hair. Whether I am at work teaching summer school, meeting a friend for lunch, or enjoying my family reunion, buns have been my go-to style. Why am I so enthralled with keeping my hair up and tucked away? Because it is so EASY and helps me to retain lots of length. Not only that, but my hair stays moisturized longer. I can roll out of bed, take my shower, and be ready for my summer gig in no time! How do I maintain my twisted bun?

To style a twisted bun you will need the following supplies:


  • Thin, black Goody Ouchless band
  • Stylish cloth or plastic band
  • 15-20 bobby pins (or as many as you need)
  • Spritz--I used bottled water, aloe vera juice, detangling tea, rosemary oil, and JBCO.
  • Natural Gel-- My fav is Shea Moisture Curling Souffle.
  • Natural Pomade--My fav is Tropic Isles Rosemary JBCO pomade.


I style my hair with a spritz, natural gel, and natural pomade. I start with a clean, conditioned head. I air dry my hair over night in gigantic twists. The next day, I finger detangle and section my hair into four sections. Think of quadrants.. Two sections in the front and two sections in the back. Begin twisting your hair into the size of twists that you want. I prefer medium twists, because I have issues with the takedown from mini twists. I prefer to mix a little souffle with pomade and then apply to each section. I twist really tight per the Naptural85 method. I tightly twist until the hair can't be twisted anymore then move down to the next section.

Front view 
Then, I used a thin, black ouchless headband to pull the twists upward from my face. I wrapped the ouchless band twice for a secure hold. Then, I slowly pulled it upward toward the crown of my head. I was careful not to pull too tight.

Next, I sectioned my twists into two gigantic sections--One on the left back side of my head and one on the right. I folded my twists over my hand and pinned each side down starting with the back section top to bottom.


Side view 


Finally, I smoothed down stray hairs and used a little pomade on my edges and hairs in the back. I wrapped my hair with a silk scarf to hold the style and smooth down my hairs.

I added a colorful scarf to create style and give my bun a vibrant look. The first time that I did that style I used a plain black, chunky headband. The cool thing about the headbands is that you can go casual or more dressy dependent upon your destination for the day.

Next time I plan to make my bun more uniform. I know that it is slightly off centered. For me, the art of twisted buns is an ongoing process. My first goal was to make sure that it looked neat and presentable, which I think I accomplished. When I do it again, I will be sure that each side is more symmetrical. That slightly lopsided bun look didn't get any weird looks, thank God! 

Back view
This style is easy and very sensible for the summer. I don't have to sorry about stray hairs or frizz. I can go about my date without worrying that my style will morph into something else. On rainy days my bun still remains in tact and on sunny days, it keeps my neck cool. Now that my curly hair is growing past shoulder length (stretched inching past APL), keeping it off my shoulders helps me to retain length. This is definitely becoming one of my favorite styles for the summer. I can't wait to adapt it for fall and winter!!

Dear readers, have you tried a twisted bun? What tips do you have for styling and maintaining it? What are your go to styles for the summer?

Thursday, July 25, 2013

July Flat Iron Fiasco

I'm still asking myself why did I flat iron my hair on the hottest week this summer. Maybe I'm a glutton for punishment. Perhaps I just am a hard headed natural. Whatever the case, I'm reflecting on what went wrong and what I learned from the July 2013 Flat Iron Fiasco. In order to understand what went wrong I revisited my flat iron routine and compared it to what I did to lead to me looking like a distorted black Dolly Pardon.

When I usually flat iron my hair I am meticulous about the products that I use and my flat iron routine. The following is my usual flat iron routine:


  • Detangle, prepoo with oil (usually JBCO)
  • Rinse hair thoroughly and shampoo with heat protectant shampoo (Nubian Heritage Black Seed & Honey shampoo).
  • Rinse out condition (usually TRESemme Naturals)
  • Leave-In Kinky Curly Knot Today conditioner
  • Use a wide tooth comb to carefully comb out curls
  • Spray hair with Nubian Heritage Black Seed & Honey Heat Protectant Spray.
  • Blow dry hair on low.
  • After hair is dry apply Wild Growth Hair Oil in sections.
  • Set flat iron on medium heat and flat iron hair in sections.


This time I deviated from my normal routine and now I can see where I went wrong. I used different products and that definitely resulted in the Dolly Pardon look (no offense Dolly, but that's not the look I was going for). Without posting the specific products that I used, let's just say that the heat protectant spray that I used was recommended by a sales rep at a local beauty supply store. It contained a lot of ingredients that I cannot pronounce. Unfortunately, that spray made my hair feel coated and funny. I won't make that mistake again. Ugh!!!!

Well, on the bright side my hair is growing nicely. I felt proud of my hair but on the other hand, I couldn't wait to wash it out and let it curl back up again. All I could do while on vacation was wear my hair in a ponytail. Wearing it out was just too much in the Southern heat. Lesson learned!!!

What is the moral of my story? Don't deviate from what is working. It may be tempting to try a new product, but unless you have time to hide under a rock if it comes out looking crazy, DON'T DO IT! Stick to what you know!! Ah, message received!

Friday, July 12, 2013

NaturelleGrow: ALL Hair CAN Grow!

SPOTLIGHT ON UP & COMING NATURAL

Renee Dawes 

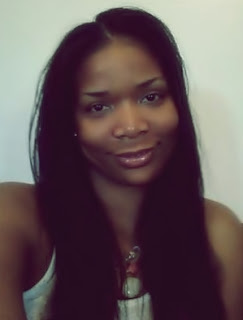
Renee Dawes, Owner & Creator of
NaturelleGrow Handmade Hair Products

For months now, I’ve been using NaturelleGrow products and I have experienced phenomenal results. Impressed with the quality ingredients and superior performance of the products, I reached out to NaturelleGrow products owner, Renee Dawes, for an exclusive interview with The Forgotten Natural Blog.

Renee, thank you so much for agreeing to do an interview with The Forgotten Natural Blog. Can you please tell us a little bit about yourself?

I am originally from Ohio, but up until recently I lived in New York. Currently, my family and I are relocating back to Ohio.  My husband and I have worked in ministry for the last 11 yrs. We have had our own church for the past 3 yrs. We have two daughters, ages 14 and 8.


How did your hair journey influence your decision to start a company?

In my younger years I was relaxed.  In high school, I wore weaves a lot and the glue I was using caused my hair to become so damaged that my edges were gone. My scalp was white and flaky. Then, I began sewing in the weaves. I had the mindset that my hair wouldn’t grow. It got to the point where I couldn’t even relax my hair anymore; it was so thin.  So, in 2007 I slowly transitioned to natural.

Once I started learning how to take care of my hair; it started growing. It became a passion. I was trying all kinds of products and investigating the ingredients in products. I began studying herbs and finding out how beneficial the herbs are for hair. I was interested in long and healthy hair. As a result, I decided to find out how to make conditioners, cleansers, etc. I looked into which natural products would work. I was able to test the different formulations on the different hair types of my family members (relaxed, natural, kinky, curly). I was able to determine that natural products work on all hair types.  I discovered that people, who had never grown hair, were able to do so using natural hair products.  I became passionate about helping others attain what I had; long healthy hair. Once I figured things out, my hair went from chin length to armpit length. Once I began making my own products it grew to waist length. Currently, it is almost TBL (tail-bone) length.


With all the different natural hair product companies out here, what do you think makes NaturelleGrow unique?

Customer service and having a relationship with the customers are very important to me. I believe in putting the customer and his or her needs first. When you are a small company, you have the ability to reach out and touch people’s lives. We provide fresh ingredients and listen to what the customers actually need.

Can you share with us your weekly hair routine?

I cleanse my hair and then, I do an herbal rinse. Next, I put in my deep conditioner and sit underneath the dryer for about 15 minutes. All of my deep conditioners are especially formulated for dry hair. After rinsing out the deep conditioner, I put in a moisturizer and then I plait about 5 braids. Next, I will sit under the dryer and then, comb it out. Some days I use a blow dryer and straighten it.

During the winter, I set my hair on large rollers and sit underneath the dryer. After my hair has dried, I put hair butter on my ends or moisturizer and pull it back into a ponytail.


How have your products helped your customers with their own hair journeys?

For years my sister’s hair didn’t grow and now her hair is mid back length.
One person e-mailed me the other day. She said that at first she was skeptical, but she was using my oil on her daughter’s hair. It worked exceptionally well. Another person has relaxed hair and she told me that she noticed the moisture in her hair improve right away after using NaturelleGrow products.

Do you have any new products coming out?  If so, when can we expect to be able to purchase them?

NaturelleGrow has a new hair growth oil that is expected to be launched August 2013.  After testing out the oil for some time, I was astounded by the fast results. This oil works VERY well to aid hair growth!


What do you think is the most important thing to remember when caring for kinky, coily, and curly textured hair?

All hair is beautiful. All hair will grow. Long hair has nothing to do with your race or genetic make up. The most important thing is that you must treat your hair as though it was fine china. Your hair is constantly growing but you must focus on retaining the hair you have. You must learn what your hair likes and dislikes. Get to know YOUR hair. Treat your hair well and it will flourish.  


To order NaturelleGrow products visit  NaturelleGrow on Etsy

NaturelleGrow handmade products are fresh and all natural.


Friday, June 28, 2013

Optimizing the Summer Growth Spurt

Summer is my favorite time of year. People are happy. No school (well, for some people), perpetual sunshine, summer concerts, and my hair GROWTH SPURT. Woot! Woot! I always get this big hair growth spurt during the summer. I don't know what it is about summer that makes my hair shoot out of my scalp like it's doing a race or something. All I know is by September/October my hair is usually a lot longer than when I started in the summer. This year I've been thinking what if I did things to spruce up and add to my summer growth spurt? Hopefully, you saw my last post on my summer regimen. If not, just click on my summer regimen post and read all about what I plan to do this summer. I figured why not be strategic about my growth this summer and measure the growth on October? Sounds like a plan!! What am I doing to OPTIMIZE my summer growth spurt?

#1. Cleanse my scalp/ condition my hair. Nice scalp massages while I loosen oil and dirt ALWAYS does my scalp good. Then, a generous helping of conditioner after I rinse my hair of soap. For me, dirt doesn't grow hair. It blocks my hair follicles and causes breakage. MY hair grows better when my scalp is clean and not irritated. People with scalp conditions like mine benefit from having clean scalps.

#2. Oil my scalp with Pimento Oil. Everything that I'm doing is for the health of my scalp and hair. Keeping an itch and irritation free scalp, helps me to avoid scratching and digging, which could infect my scalp. I don't use my fingernails to massage, but rather the pads of my fingers. The ingredients in the  pimento oil is soothing and stimulates the scalp. It's a win/win situation!

#3. Twist, pin, and go. My definite go-to style is the two strand twists updo. It keeps me from having "hands in hair" syndrome. I twist, bobby pin up, and go to work. No stress/no mess. While I like having my hair out and curly, I'm minimizing that to optimize my growth spurt. Keeping my ends tucked away and protected will allow my hair to grow without a lot of manipulation.

#4. Snip, snip, and GROW. I just trimmed my hair and now my ends are feeling like the gates of heaven have opened up. Aaahhhh!! Heh heh.. No, but seriously why do people hold on to scraggly, raggedy, ratched ends? All it does is stunt your growth if you have dryness and/or split ends. I'm not even going to try to "repair" those ends. Snip, snip and keep it moving. I won't be trimming again until October. I just realized that I snip every season. Hey! That DOES make sense, doesn't it?

#5. Oh, so GOOD ingredients. I'm a natural hair product diva. My hair loves some of the BEST ingredients that nature has to offer, so why not give Fluffy what she craves? Everything that I use from my luscious oil prepoo (prepared with JBCO Coconut Oil) to my rich deep conditioner contain ingredients that are EXCELLENT for strengthening, conditioning, and moisturizing my hair. No skimping this summer!!

#6. Handle with care. No ripping through my hair rushing through detangling sessions. I'm not trying to rip out hair balls. Instead, I'll be scheduling my sessions on my off days to ensure that I lose the tangles, but not come away with gigantic hairballs.

Dear readers, how are you going to consciously optimize your hair growth this summer?

Sunday, June 16, 2013

My Summer Regimen

This summer promises to be hot and sometimes stormy here in my neck of the woods. We've already had several thunderstorms and a tornado touched down just the other day. OK, so how does weather affect my styling plans? I plan to continue cleansing, conditioning, and moisturizing. That part hasn't changed at all. However, I have decided to go back to rotating my shampoo bars as my hair dictates whether it needs extra moisture or cleansing. Like other people in my profession (I am a teacher) I have a summer job working with students. This means that I don't have enormous amounts of time to do my hair.

My Summer Hair Regimen


  • Henna Treatment--3-4 more times during the summer to get a deeper auburn hue
  • Cleanse my hair every week with a Chagrin Valley shampoo bar.
  • Condition with first a rinse out conditioner then a deep conditioner.
  • Apply my leave-in to soaking wet hair and air dry. 
  • Then, style my hair in two strand twists or braids. 
  • Do pin updos, twists, and buns for protective styling
  • Every day I will spritz with my homemade spritz to moisturize and every week I will oil my scalp with Jamaican Pimento oil.

Recent braid out w/ Shea Moisture
Curl Enhancing Smoothie &
Shea Moisture Curling Souffle

Products I Heart

  • Chagrin Valley shampoo bars
  • Naturelle Grow Coconut Water Cleansing Cream
  • Naturelle Grow Chamomile/Burdock Root Deep Conditioner
  • Sunny Isle Jamaican Pimento Oil
  • Tropic Isle Jamaican Black Castor Oil
  • Wild Growth Hair Oil
  • Shea Moisture Curl and Style Milk 
  • Shea Moisture Curl Enhancing smoothie
  • Shea Moisture Curling Souffle

Dear readers, what is your summer regimen? What products do you plan to use during the summer to keep your styles fresh?

Friday, June 14, 2013

My Henna Journey- Part 3: The 2nd Time Around

I have become a henna lover and it is growing with each application. There is something about henna that keeps pulling me in like that lover you just can't manage to say no to. But, not in a crazy eyed, hypnotic, weirdo kind of way. It's more of a healthy addiction, if there is such a thing. It's hard to explain, except to say that the more you do it, the more you love it.

I have been reading everything that I can find about henna: how to mix it properly, what to use, the benefits, and the drawbacks. My interest in henna has grown by leaps and bounds as I not only read about it, but experience it firsthand. After this second application, I have had some more epiphanies about this wonderful natural product. And aren't you just anxious to hear more about it? Well, I'm glad you asked! So, here it goes!

#1. Henna isn't just a treatment; it's a lifestyle. Henna heads will tell you that our haircare centers around proper treatment and henna is at the center. Because henna offers optimal strength and conditioning, everything that you do before and after you henna increases your hair's health. From detangling your hair properly to using a proper deep conditioner, EVERYTHING contributes to the best or henna experience. I'm so grateful to all of the ladies on the CurlyNikki Forum that offer the BEST henna advice EVER!

#2. Henna mixes aren't one size fits all. Just because someone else loves lemon juice in their mix, don't expect it to work the same for you. Why? Because what you put in your henna mix must be tailored specifically for your hair's needs. Typically lemon juice is drying for most Afro textured hair, but if you have oily hair and/or scalp then it may not negatively affect you. Keep in mind that the straight haired henna heads can get away with really acidic juices in their mix, because of the natural oils that they have that flow more easily down the hair strand. Those of us with drier hair textures prefer green tea, hibiscus tea, aloe vera juice, apple cider vinegar or (my favorite) coconut milk. It takes practice to figure out what will work best. Some people add oils to their mix and other people keep their mix simple. You have to play around with your mix to get the perfect combination.

#3. The perfect henna mix looks like a paste or pudding not a soup. I learned this the hard way, because my first mix was like a pea soup instead of a paste consistency. It was a messy situation. I didn't share this with you in the article, so I am gonna confess something. I got a few splotches will trying to apply the henna mix the first time. It was like a liquid and so it splashed a little. It wasn't terrible, but this time when I did a paste mixture there were no splotches. Also, the color doesn't deposit as well when you use a thin mixture. The thicker paste sticks to the hair strands and deposits better color.

My 2nd henna-- 06/13/2013


#4. Get good quality henna, because some of the cheap stuff will leave you with crispy, shedding hair. Thank God I didn't experience this myself. I learned vicariously through lurking blogs and forums that the worst henna experiences came from people purchasing el cheapo henna from some place that had poor quality products. Companies like Henna Sooq have organic certified products and top quality henna. You don't have to worry about picking twigs, sticks, and other drags out of your hair. It is packaged well and when you open the package you will know that it is a fresh quality.

#5. Allow the color to release before you apply the henna mix to your hair. I like how the henna will "tell" you that it is ready. When I first mix it I see a green color, but once the dye releases it turns to the color of mud. It is awesome. Oh, and I learned that you can freeze the left over henna. When you de-thaw and use the henna, the dye releases quicker than freshly made henna. Isn't that awesome?

#6. You may want to give henna a try if you have a scalp condition. I have a condition called seborrhea dermatitis. It is usually under control, but when the weather changes or if I experience stress, it may flare up. After applying henna the first time, my scalp became different. Although I still experienced flare ups, it wasn't as intense as my previous episodes. During this second application my scalp had a nice, slight tingle. After rinsing out the henna my scalp felt clean not stripped. I felt as though my scalp had undergone a special treatment. If for no other benefit, I love henna because it helps my scalp condition.

Readers, are you considering joining the henna nation? Do you have questions about the process? Or are you an expert henna head? Share your thoughts and/or questions. 


Saturday, June 8, 2013

A Bun, Storm, and Unexpected Surprise

Why Must It Be So Difficult?

I've never been one to bun my hair. It's just not something I did. I used to practically live in twists UNTIL the twists no longer worked for me. So, enter henna and well, I just fell in love with this herbal treatment obviously sent by the Gods. I mean, had I known that henna is definitely for me, I would have used henna a LONG time ago. Anyway, back to the bun. How many people wear their perfectly formed buns that look so sophisticated yet can be easily worn at work or school? I didn't think buns were necessarily for me and then, my lazy side took over.

One day I'm sitting in front of the TV twisting my hair and my arms began to tire. I kept thinking why am I taking so much time to only have skimpy, anorexic twists? So, I undid the twists, and then I began to mess around with my Goody Ouchless band. Lo, and behold my curly bun was formed. I could care less if my bun is exactly symmetrically formed or perfectly sleek. While a sleek bun is definitely attractive, a bun that is nice yet fun isn't so bad at all. Now, I'm not advocating not taking your time to do a bun, but should it be a headache and a half? Nope!


How I Do This Bun Thing

Ok, so here's the breakdown on how I do my perfectly imperfect bun. You will only need a few minutes in the morning and you will be out the door in no time! I did say that I'm definitely a minimalists didn't I?

STEP #1-- Spritz hair with water and/or a water/oil mixture and gently smooth the hair.

STEP #2--Add a good moisturizer. I used Shea Moisture Curl & Shine Mist. 

STEP #3--Pull your hair up into a high ponytail with the Goody Ouchless band. It should be thin enough that you can wrap it twice.

STEP #4-- Separate the ponytail into two halves.

STEP #5-- Bend one side of the ponytail into a little puff then pin.

STEP #6-- Pin the other side of the ponytail into a second puff then pin.

STEP #7--Squish the bun gently to make it look uniform and add more pins as needed.

STEP #8-- Spritz water on your edges and add gel. I used Creme of Nature Argan Oil Perfect Edges.

My first bun as a henna head!


The Bun Saga Continues

I hope this was simple and not a headache, because this method saved me time. I mean, when I say saved time, you wouldn't believe how easy it was to do, once I got the hang of it.

The cool thing about buns is that you can add a scarf for a fun look or wear earrings and a special outfit to jazz it up a bit. Buns can be as big as you would like or smaller and neater. Practice your buns and decide how high you would like it and play around with the form. Oh, and my bun held up VERY well during our extra rainy days during a messy tropical storm. What was the surprise? The surprise is that I was able to actually do a hairstyle and it turned out VERY well.

Sunday, June 2, 2013

JBCO: My Liquid Gold and Why It Changed My Hair

I'm going to be honest with you. Being a fine haired curly can be quite challenging to say the least. Fine hair strands make it difficult to avoid breaking the hair when detangling. Also, because my hair is low density, certain styles make me look like a shaven bird. I've tried some of those cut two strand twist styles and frankly, my hair just looks a lot better when it's out. OK, that brings me to another point. When you have fine hair and low density hair you have to work extremely hard to create volume where there is none. Tired of layering twists and trying volumizing products, I encountered Jamaican Black Castor Oil (JBCO).

Hair Trouble and Why I Turned to JBCO
After years of suffering from hair thinning and hair loss, I was at my wits end trying to figure out what to use to stop my hair from falling out. I was losing hair in my crown and edges. I was not feeling very confident, but I always kept the faith that eventually I would find something. As you may have read in my previous posts about my hair journey, I did find great natural hair products that slowed down the hair loss and helped with some regrowth. However, I still saw spots that were thinner than the rest of my hair. This frustrated me and I was determined to find something that would not only regrow hair but thicken up my hair to increase the density. Now, I'm not a scientist, so if you're looking for a scientific explanation then you've come to the wrong blog. I'm just a common everyday person, who is sharing how a simple, natural, inexpensive remedy helped me regrow and thicken my hair.

Why is JBCO so popular? Touted as a miracle oil by many in the natural community JBCO has several benefits including treating skin ailments, increasing hair volume, and eliminating thinness. I won't get into the debate on whether JBCO is better than regular castor oil. I just know that from my experience JBCO changed my hair for the better. It will be a year this summer since I began consistently using JBCO on my hair and scalp. Looking back at my photos I can see why JBCO is one of the most talked about hair oils in the natural community.

How do you use JBCO? JBCO can be used in several ways. I will share with you just a few ways that I like to use JBCO. These uses have helped me go from wimpy, thin hair to va-va-va- voom natural hair that is becoming so voluminous that I get lots of compliments.

The Many JBCO Mixes & Why They Work! I started out using just plain old JBCO. I had to get use to the thickness and stickiness of the oil. But, once I learned that less is more, I began to enjoy the healing therapy and benefits. There are so many different combinations of JBCO and other oils. Tropic Isle Living and Sunny Isle provide quality products with mixtures to fit almost every need and/or preference. Coconut, argan, rosemary, ylang ylang, and lavender are just some of the other oil combinations available. Currently, I am alternating between using the Coconut JBCO and the Rosemary JBCO. There is an added benefit to using JBCO in conjunction with other oils. Coconut oil penetrates the hair strand and rosemary is known to aid in hair growth. Of course, the other oils also have excellent benefits. Choose a plain JBCO or one that has an added oil based on what you prefer and/or need for YOUR hair.
July 2012-BEFORE JBCO

September 2011-BEFORE JBCO 


Add JBCO to Your Conditioner and/or Deep Conditioner

A little goes a long way so just put a couple of drops in your deep conditioner or rinse out conditioner. It will add to the moisture and make rinsing out the conditioner a luxurious experience. It softens my hair and makes it feel so good.


AFTER  8 months of JBCO-June 2013


AFTER 1 month of JBCO-September 2012


Add JBCO to Your Daily Spritz

Just a few drops in your daily spritz to ensure that you are on your way to voluminous hair. I make sure that I add enough so that it is about 1/4 of the bottle. I shake vigorously to ensure that it is well mixed. Since adding JBCO to my daily spritz my hair has a sheen and moisture.

JBCO As a Part of Your Night Routine

I love using just a small dropper bottle to dab JBCO on my thinning areas (my crown and edges). I have a small area right in the front that has grown lots and lots of little hairs in it thanks to JBCO. No more balding areas.


Are you balding, shedding, or have uneven hair due to breakage? Jamaican Black Castor Oil is truly a miracle oil. It REALLY has changed my hair and it may just work for you. I've seen the expensive hair treatments and I've even experienced prescription strength medication. Here's the thing.. I believe that in nature our Creator has provided us with the resources to cure any ailment. Yes, I believe that natural products are the way to go for health problems including hair loss. If hair loss is genetic then of course, there is very little that can be done. But, if you are experiencing hair loss due to allergies, stress, diet, etc. then the cure IS in nature. Yes, JBCO has additives, such as the ash which gives the oil its dark color, BUT, castor oil is derived from the castor bean which is grown.


Where do you purchase Jamaican Black Castor Oil? Check out your local health food store, grocery store, ethnic market, and beauty supply store. If you live in an area in which JBCO is difficult to find then you may order it online.  


Click on the links below to learn more or to order Jamaican Black Castor Oil products.

Sunny Isle Jamaican Black Castor Oil Products

Tropic Isle Living Jamaican Black Castor Oil Products